
Winter Chowders, Stews, and House-Made Sourdough Insight
December is an exciting time of togetherness, nourishment, and enjoying the various celebrations that take place throughout the month. During Winter, you may often crave heavier ‘comfort foods’. These foods are typically served hot, are higher in calories, and are seen as specialty items around holiday tables; but did you know that these foods are no accident during the colder months? As our bodies try to keep up with the extra calories it takes to stay warm in freezing temperatures, it’s common to reach for foods that can help us achieve the goal of staying warm and nourished. Of course, many of us associate comfort foods with sweets, but there’s a healthier way to meet our Winter caloric needs that won’t leave you feeling sluggish. Instead, our chefs look toward the season’s natural bounty – yes, even Winter has its season of favorites ranging from hearty winter squash, root vegetables, select fruits, clean proteins, and ancient grains that you’ll soon see within of our cafes in a variety of scratch-made stews and chowders.
Stews and chowders are a hearty, filling, and comforting option to enjoy throughout the winter months that meet our biological desire for calories, warmth, and delicious flavor! Within our kitchens you can rest assured that these offerings are 100% scratch-made by our chefs who use custom, dietitian-backed recipes to ensure optimal nutrition. We enhance your dining experience with our handcrafted stews and chowders, by cooking with fresh, whole ingredients prepared through slicing, dicing, sautéing, and simmering to perfection, so you can enjoy a comforting, nutritious meal. Oftentimes, you’ll notice house-baked sides to accompany your stews and chowders, which is just as exciting as the main course when you learn that we house-bake many of our breads, including our sourdough options!
Learn How to Make House-Made Sourdough with Chef Seth
Sourdough is an excellent side to pair with your favorite stew or chowder. The robust flavor offered by sourdough is unique and stems from the fermentation process that the dough undergoes during the 7-day fermentation cycle. Our chefs oftentimes keep fresh sourdough on hand, which means that behind the scenes they take the time to feed the sourdough and ensure its prepared fresh for your roll, sourdough bowl, or sliced sandwich. If our teams didn’t cook from scratch, this approach wouldn’t be possible, and you may end up with a more processed bread which in turn doesn’t offer the same benefits as freshly made sourdough breads. Oftentimes, individuals who experience indigestion due to traditional wheat breads will find that sourdough is a more agreeable bread to enjoy because the fermentation process breaks down the wheat enough to accommodate their more sensitive gut microbiome. This fact alone is enough of an inspiration for our chefs to embark on the journey of creating sourdough in-house, because everybody deserves the chance to enjoy the dignity of dining alongside their friends within our cafes and enjoy a shared experience.
Chef Seth Bostick is one of our chefs who prioritizes creating house-made sourdough to pair with your favorite entrees. In a recent tutorial, he wanted to share with you the steps of making your own sourdough starter, and how he creates the perfect loaf, roll, or sourdough bowl! The starter that Seth works with is 10 years old, and the breads are enjoyed within our Salt Lake City community. Please follow along to learn more about how we create sourdough breads in-house and explore the possibility of making your very own sourdough starter to enjoy at home!
Learn How To Make a Sourdough Starter at Home
What is a sourdough starter?
At a high level, a sourdough starter is a mixture of flour and water that hosts a stable blend of beneficial bacteria and wild yeasts. It is the batter that is used to make a loaf of sourdough bread after a seven-day fermentation process. Below are instructions about how to make your very own sourdough starter, just like our chefs!
Sourdough Starter Instructions
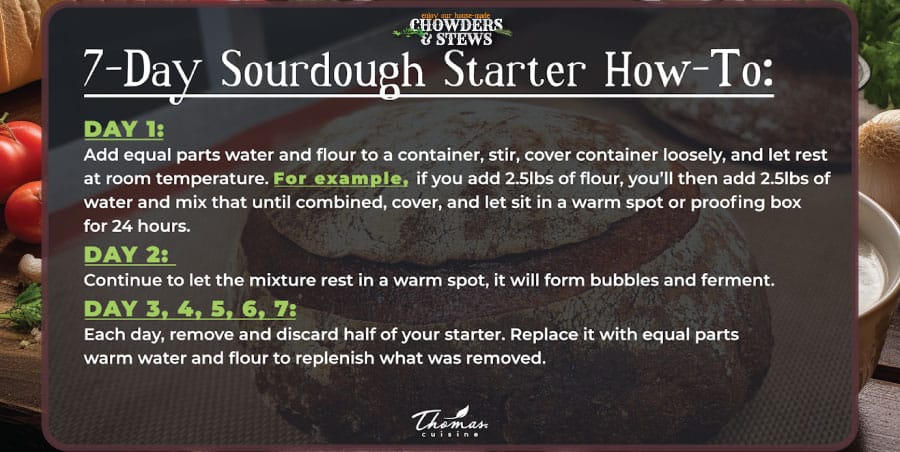
- Day 1: add equal parts water and flour to a container, stir, cover container loosely, and let rest at room temperature. For example, if you add 2.5lbs of flour, you’ll then add 2.5 lbs of water and mix that until combined, cover, and let sit in a warm spot or proofing box for 24 hours.
- Day 2: Check on your starter, you may see small bubbles forming, if not that’s okay. Continue to let the mixture rest in a warm spot.
- Day 3: Remove and discard half of your starter. Replace it with the same amount of warm water and flour to replenish what was removed, i.e. if you had five pounds of sourdough starter, and you remove half of the batter, then replenish it with 1.25lbs flour and 1.25lbs water to replace the 2.5lbs of starter that you removed. Adding this fresh flour-water mixture is how you feed your sourdough.
- Day 4, 5, 6: Each day, remove and discard half of your starter. Replace it with the same amount of warm water and flour to replenish what was removed.
- Day 7: Your starter should be doubled in size with plenty of bubbles, if this condition has not been met due to inconsistent temperatures, timing or other factors, let the starter sit and continue feeding it for 1-2 weeks, be patient, it will happen. To test if the starter is fully active, do a float test, where you drop a teaspoon of your starter into a jar of water, if it floats, it’s ready to use.
Baking sourdough bread, for the Home Chef:
- Prepare the sourdough starter using the instructions above until you reach day 7.
- Mix the dough: Mix the ingredients until a shaggy dough forms and then solidifies, usually 3 minutes with a dough hook on low, then another 2 minutes on medium-low.
- Knead the dough: Turn the dough out onto a floured surface. Knead the dough for about 10-15 minutes until it becomes smooth and elastic. Add more flour if the dough is too sticky.
- Bulk fermentation: Place the dough in a large bowl, cover it, and let it rest at room temperature for about 3 hours, or until it has doubled in size. You’ll need to fold the dough every hour to develop the gluten.
- Shape the loaves: Divide the dough into the desired number of loaves, rolls, or as breadbowls by shaping each portion into a round or oblong loaf and place them on a floured surface, seam side down.
- Final proof: Cover the shaped loaves with a cloth and let them proof for 1-2 hours, or until they have visibly expanded.
- Preheat the oven: Preheat your oven to 450°F (232°C) and get your Dutch oven, baking sheet or a baking stone to bake your bread on.
- Score the loaves: Just before baking, score the tops of the loaves with a sharp knife to allow them to expand during baking. There are many designs for bread loafs, if creating a bread bowl, slash a semi-circle ¾ of the way around the loaf to allow for top removal after baking.
- Bake: Bake for about 20-30 minutes on a baking sheet, then rotate the sheet, and continue baking for another 20-30 minutes or until the bread is golden brown. If you’re using a dutch oven, bake for the first 20-30 minutes with the lid on, then remove the lid for the last 20-30 minutes of baking, making the total bake time 40-60 minutes.
- Cool: Allow the bread to cool on a wire rack before slicing, enjoy!


